


Table of Contents
ToggleA butler’s pantry bridges the gap between kitchen chaos and dining room elegance, a hardworking prep zone that hides the mess while adding serious storage and counter space. Originally designed for staff to stage meals and store fine china, today’s butler pantries serve homeowners who need room to spread out during meal prep, stash small appliances, or set up a coffee and beverage bar. Whether tucked between a kitchen and dining room or carved from an awkward hallway, a well-designed butler’s pantry ideas can transform how a household functions. This guide walks through practical layouts, storage strategies, and finishing details that make these spaces work.
Key Takeaways
- A butler’s pantry serves as a transitional prep and service station between the kitchen and dining area, providing essential counter space, storage, and a staging area that keeps clutter out of sight during meal prep and entertaining.
- Counter space should measure at least 24 inches deep by 36 inches wide (ideally 48+ inches) to accommodate small appliances, mixing drinks, and plating simultaneously without compromising workflow.
- Butler’s pantry ideas benefit from a mix of closed storage (base cabinets for flatware and linens) and open shelving (glass-front cabinets for frequently used glassware and serving pieces) to balance accessibility and aesthetics.
- A small prep sink (15–18 inches) is optional but highly practical for rinsing glassware and washing hands; ensure all plumbing and electrical work meets local codes, including GFCI-protected outlets within six feet of water sources.
- Storage solutions like pull-out shelves, vertical dividers, plate racks, and stemware holders maximize function while keeping dinnerware and serving items organized and visible.
- Task lighting with LED under-cabinet strips and overhead fixtures (50–75 lumens per square foot) combined with durable countertops like quartz or granite transforms the pantry into a hardworking and stylish space that adds perceived luxury and resale value.
What Is a Butler’s Pantry and Why Add One?
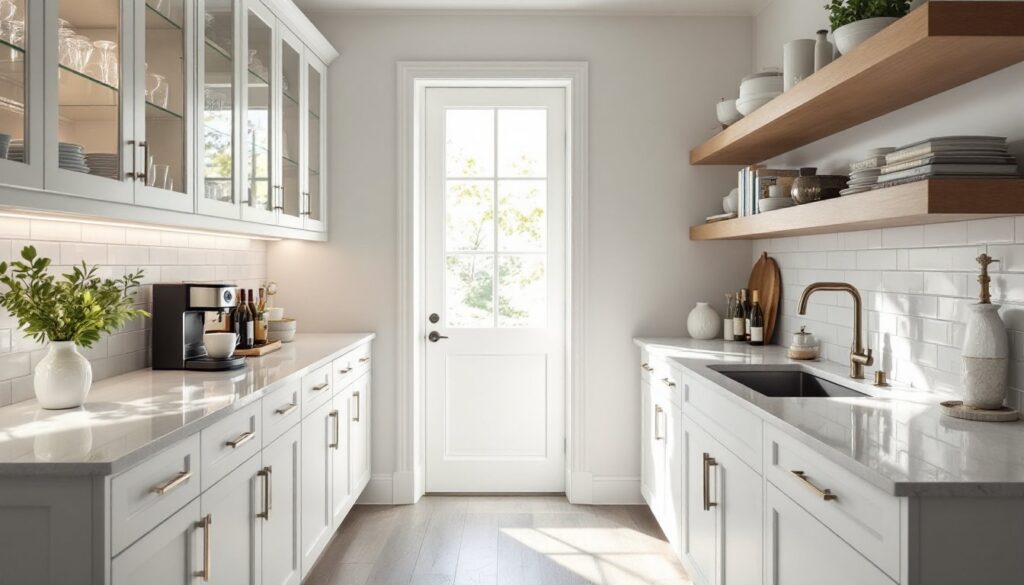
A butler’s pantry is a transitional room or alcove between the kitchen and dining area, typically equipped with cabinets, countertops, and sometimes a sink. Unlike a walk-in pantry focused solely on food storage, a butler’s pantry functions as a secondary prep and service station. It keeps countertop appliances, glassware, and serving dishes out of the main kitchen while providing workspace for plating, mixing drinks, or arranging appetizers.
Homeowners add butler’s pantries to gain elbow room during cooking and entertaining. When the main kitchen fills up with cookware and ingredients, the butler’s pantry offers a staging area that keeps dirty dishes and clutter out of sight. It’s especially useful during holidays or dinner parties, when multiple people need counter space at once.
From a resale perspective, a butler’s pantry adds functional square footage and perceived luxury. Buyers appreciate dedicated storage for items they don’t want cluttering countertops, stand mixers, blenders, specialty serving pieces, and the convenience of a beverage station or coffee bar separate from the cooking zone. The key is designing it for real work, not just show.
Essential Features Every Butler’s Pantry Should Include
Counter space is the baseline. A minimum of 24 inches deep and 36 inches wide gives enough room to set down trays or mix drinks. If space allows, aim for 48 inches or more of continuous counter to accommodate small appliances and prep work simultaneously.
Cabinets and shelving should balance closed and open storage. Base cabinets with drawers handle flatware, linens, and bar tools. Upper cabinets keep glassware, dinnerware, and serving platters within reach. Adjustable shelves accommodate everything from wine bottles to oversized platters. For visibility and convenience, consider glass-front upper cabinets or open shelving for frequently used items.
A sink is optional but highly practical. A small prep sink (15 to 18 inches), often a bar or undermount style, lets users rinse glassware, wash hands, or fill water pitchers without trekking back to the main kitchen. Plumbing adds cost and may require a permit, so plan early if including one. Ensure drain and supply lines meet local code, typically governed by the International Plumbing Code (IPC).
Electrical outlets are non-negotiable if the space will hold coffee makers, blenders, or wine fridges. Install GFCI-protected outlets within six feet of any sink, per National Electrical Code (NEC) 210.8. Spacing outlets every 48 inches along the counter ensures flexibility. Include at least one 20-amp circuit if running multiple appliances.
Ventilation matters if installing a coffee station or wine fridge. While not a code requirement for pantries, adequate airflow prevents humidity buildup and odors, especially in tight spaces.
Layout and Design Ideas for Small Spaces
Not every home has a separate room for a butler’s pantry. Narrow hallways, closets, or alcoves can work if planned carefully. A galley-style layout, cabinets and counters along one or both walls, maximizes storage in a corridor as narrow as 36 inches, though 42 to 48 inches feels less cramped.
For truly tight spots, a single-wall setup with upper and lower cabinets on one side and a slim counter (18 to 20 inches deep instead of the standard 24) keeps the path clear. Skip the sink if plumbing is difficult to access: a countertop and closed storage still provide utility.
Pocket doors or barn-style sliders save swing clearance in tight quarters. A standard hinged door needs at least 30 inches of clearance, eating into usable floor space. Pocket doors slide into the wall cavity, though they require planning during framing. Barn doors mount on surface tracks and work in retrofit situations, but they don’t seal sound or odors as effectively.
Consider corner butler’s pantries if the layout allows. An L-shaped configuration tucks into an inside corner between kitchen and dining room, using otherwise dead space. Lazy Susans or pull-out corner units make the deep cabinet sections accessible.
In homes without adjacent dining rooms, a butler’s pantry can occupy a reworked closet near the kitchen. Remove the closet door, add a countertop with cabinets above and below, and install task lighting. Even a 24-inch-deep by 48-inch-wide closet becomes a functional beverage station or small-appliance garage.
Storage Solutions That Blend Style and Function
Pull-out shelves and deep drawers handle bulky items like slow cookers, roasting pans, and large mixing bowls. Standard base cabinets are 24 inches deep: roll-out trays bring contents forward without requiring users to dig into the back.
Vertical dividers in base cabinets organize baking sheets, cutting boards, and serving trays upright. A divider every 2 to 3 inches keeps items from tipping. These inserts install with screws or adjustable pegs and fit most standard cabinet boxes.
Plate racks and stemware holders turn upper cabinets into display and storage hybrids. Plate racks with 1.25-inch slots cradle dinner plates vertically, making them easier to grab than stacking. Undermount stemware racks hold wine glasses by the base, freeing shelf space and reducing breakage.
Drawer organizers for flatware and bar tools keep utensils sorted. Bamboo or molded plastic inserts fit standard drawer widths (12, 15, 18, or 21 inches) and adjust as needs change. For larger drawers, tiered inserts double capacity by stacking shallow trays.
Open shelving suits decorative storage, serving bowls, glassware, or cookbooks, but requires discipline. Dust accumulates, and visual clutter builds quickly. Limit open shelves to upper sections and pair them with closed lower cabinets to balance accessibility and tidiness.
Wine storage options include horizontal racks, diamond bins, or a small wine fridge (typically 15 to 24 inches wide). If choosing a wine fridge, ensure adequate ventilation and a dedicated outlet. Built-in units integrate cleanly but cost more than freestanding models.
Countertop and Cabinetry Choices for Your Butler’s Pantry
Countertop materials should match the workload. Quartz resists stains, scratches, and heat without sealing, making it ideal for high-use prep areas. Standard thickness is 3 cm (about 1.25 inches). Quartz runs $50 to $120 per square foot installed, depending on brand and pattern.
Granite offers natural beauty and durability but requires periodic sealing to prevent staining. It handles hot pans well, an advantage if the pantry doubles as a baking station. Pricing overlaps with quartz, generally $45 to $100 per square foot installed.
Butcher block (maple, walnut, or oak) adds warmth and works well for rolling dough or chopping. It needs regular oiling and doesn’t tolerate standing water near sinks. Expect $40 to $80 per square foot for quality hardwood.
Laminate keeps costs down, $20 to $50 per square foot installed, and modern options mimic stone or wood convincingly. It’s less durable than stone but perfectly functional for light-duty butler’s pantries.
Cabinetry style and finish should flow from the adjacent kitchen unless the pantry is fully enclosed and out of sight. Shaker-style doors in painted or stained wood suit most homes. For a streamlined look, slab-front cabinets (flat, handle-free panels) pair with contemporary kitchens.
Cabinet construction matters for longevity. Plywood box construction outlasts particleboard, especially in humid environments. Dovetail drawer boxes with undermount soft-close slides withstand daily use better than stapled boxes on side-mount slides. Upgrade hardware, pulls and knobs, to match the main kitchen for visual consistency.
Lighting and Finishing Touches to Elevate the Space
Task lighting is essential. LED under-cabinet strips or puck lights illuminate countertops for prep work and create visual interest. Install them toward the front edge of upper cabinets to minimize shadows. Hardwire them to a wall switch for convenience, or use plug-in versions if outlets are accessible.
Overhead lighting depends on ceiling height and layout. A flush-mount or semi-flush fixture works in spaces with 8-foot ceilings. In butler’s pantries with higher ceilings or longer runs, a linear LED fixture or row of small pendants spreads light evenly. Aim for 50 to 75 lumens per square foot for task-heavy spaces.
Dimmer switches add flexibility, especially if the pantry also functions as a beverage or coffee bar during evening gatherings. Choose LED-compatible dimmers to avoid flicker.
Backsplash protects walls and finishes the design. Subway tile, mosaic glass, or slab quartz all hold up to splashes and wipe clean easily. Carry the backsplash at least 18 inches above the counter, or run it full-height behind open shelving for a cohesive look. Grout lines should be sealed to resist stains.
Hardware and fixtures tie the space together. Match faucet finish (chrome, brushed nickel, matte black) to the main kitchen. Drawer pulls and cabinet knobs should align in style and scale. Coordinated details make a butler’s pantry feel intentional, not cobbled together.
Paint or wallpaper can define the space. If the butler’s pantry is enclosed, a bold color or patterned wallpaper adds personality without overwhelming the main kitchen. In open or pass-through layouts, stick to neutral tones that flow with adjacent rooms.
Conclusion
A butler’s pantry earns its square footage when it’s designed for real tasks, prepping, storing, and staging, not just aesthetics. Focus on adequate counter space, practical storage, and durable materials that match how the space will actually be used. Whether converting a closet or building from scratch, the best butler’s pantry ideas prioritize function first, then layer in finishes and lighting that make the space feel cohesive with the rest of the home.