


Table of Contents
ToggleLED lights have become the go-to upgrade for teenage girl bedrooms, and it’s easy to see why. They’re affordable, customizable, and transform a plain space into something uniquely hers. Whether she’s 12, 13, or older, LED strips, rope lights, and smart bulbs let her shift the vibe from study mode to chill zone with a tap. This guide walks through practical placement ideas, color coordination, style pairings, and shopping tips to help parents and teens create a bedroom that actually reflects her personality, without blowing the budget or drilling holes everywhere.
Key Takeaways
- LED lights transform teenage girl bedrooms affordably and safely—most strips run on 12V or 24V DC power, are renter-friendly with removable adhesive backing, and last 25,000–50,000 hours compared to traditional bulbs.
- Strategic placement of LED lights behind beds, around mirrors, and along vanities creates ambient lighting and functional illumination; measure, test with painter’s tape, and use isopropyl alcohol to clean surfaces before permanently adhering strips.
- Color psychology matters—warm white (2700K–3000K) promotes relaxation, cool white (5000K–6500K) enhances focus, while RGB options like purple, pink, and teal let teens express personality and match their bedroom style from modern to boho to glam.
- Quality RGB LED kits with remote controls start at $15–$30, while app-enabled or music-synced systems cost $25–$50; prioritize selective upgrades and use solderless connectors to extend strips rather than buying multiple full reels.
- Implement circadian-friendly settings by switching to warm tones or ‘sunset mode’ after 9 PM to avoid melatonin suppression, and use aluminum channels with diffusers to protect strips while creating a polished, built-in appearance.
- Involve your teen in the LED lighting decision-making process—set a budget, let her choose colors and placement, and preview setup with painter’s tape to prevent mistakes and build ownership of her personalized space.
Why LED Lights Are Perfect for Teen Bedrooms
LED lights check every box for teen spaces: low voltage means they’re safe to leave on, energy draw is minimal (typically 4–7 watts per 16-foot strip), and there’s no heat buildup like old incandescent bulbs. Most LED strip kits run on 12V or 24V DC power through a plug-in adapter, so no electrical work or permits required.
They’re also renter-friendly. Adhesive-backed strips peel off cleanly if she uses the included 3M tape or removable mounting clips. That matters for families who lease or plan to move.
Customization is the real draw. RGB and RGBIC strips let her cycle through 16 million colors, sync to music, or set timers via smartphone apps. For younger teens, think 12 or 13 year old bedroom ideas with LED lights, preset modes like “reading,” “party,” or “sleep” make operation simple without overwhelming controls.
Finally, LEDs last. Rated lifespans typically hit 25,000–50,000 hours. Even at 6 hours a day, that’s over a decade. Compare that to replacing bulbs every year, and the upfront cost pays off fast.
Creative LED Light Placement Ideas
Placement determines whether LEDs feel intentional or haphazard. Measure twice, stick once, most adhesive strips lose tackiness if repositioned repeatedly.
Behind the Bed and Headboard
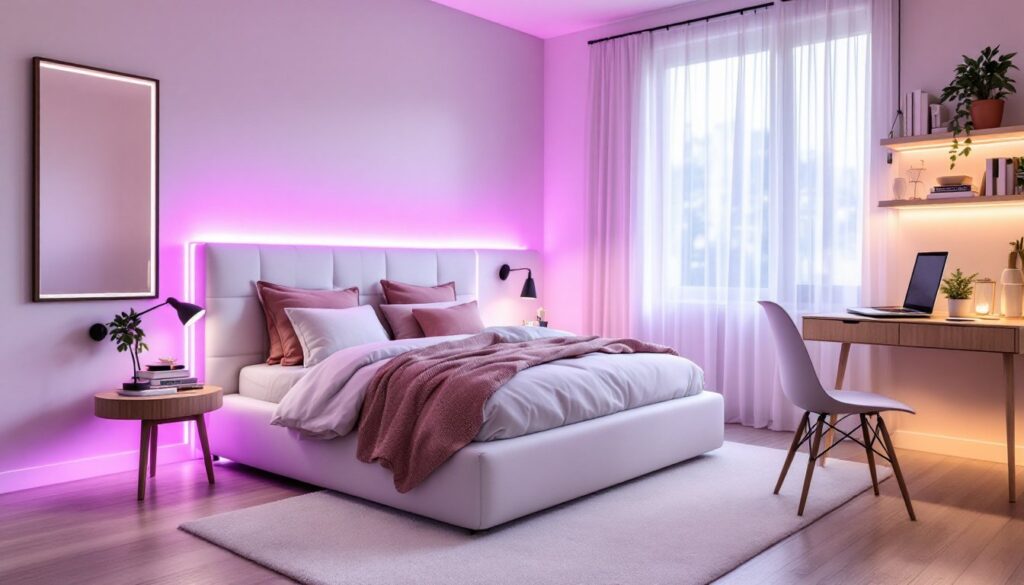
This is the classic move, and for good reason. Running LED strips along the back edge of a headboard or the perimeter of a platform bed creates a floating effect. The glow reflects off the wall, providing ambient light without glare.
Installation steps:
- Clean the mounting surface with isopropyl alcohol and let it dry fully.
- Measure the bed width and height to determine strip length. Most kits come in 16.4-foot or 32.8-foot reels and can be cut at marked intervals (usually every 3 LEDs).
- Peel backing and press firmly along the back edge, starting at a corner. Use mounting clips on textured surfaces where adhesive won’t grip.
- Route the power cable down a bedpost or along the baseboard to an outlet. Use cable clips to keep it tidy and prevent tripping.
For 13 year old bedroom ideas girl with LED lights, consider adding a second layer along the top of a tall headboard or canopy frame for a layered look.
Around Mirrors and Vanity Areas
Framing a mirror with LEDs upgrades any vanity into influencer territory. It’s functional, too, daylight-white LEDs (5000K–6500K) provide even lighting for makeup application and reduce shadows.
Best practices:
- Use IP20-rated strips (indoor, non-waterproof) unless the mirror is in a bathroom: then upgrade to IP65 for splash resistance.
- For a frameless mirror, mount the strip directly on the wall about 1 inch from the mirror edge, or attach it to the mirror backing if weight allows.
- Framed mirrors work better with strips adhered to the frame’s inner lip. Test-fit before peeling backing to confirm placement.
- If the mirror sits on a dresser, run a strip along the dresser edge or the base of the mirror for understated glow.
Smart bulbs in vanity sconces are another option. A19 or G25 bulbs with tunable white (2700K warm to 6500K cool) let her adjust color temperature based on time of day.
Color Schemes and Mood Settings With LED Lights
Color psychology isn’t just Instagram fluff, it affects concentration and sleep. Teens benefit from having control over their environment, and LEDs make that simple.
Warm white (2700K–3000K) mimics incandescent bulbs. It’s cozy, calming, and works well for winding down. Pair it with neutrals, blush pinks, or earth tones.
Cool white (5000K–6500K) enhances focus. If she’s doing assignments or art projects, cooler temps reduce eye strain. It complements modern schemes, grays, navy, crisp white.
RGB colors are where teens get creative:
- Purple and blue: Popular for chill vibes. They pair well with gray, white, or silver accents.
- Pink and magenta: Classic teen choices. Balance them with white furniture or light wood tones to avoid overload.
- Green and teal: Less common but trending. They suit boho or nature-inspired rooms.
- Multicolor gradients: RGBIC strips (the “IC” means independent control per segment) create rainbow flows or chase effects. Good for feature walls or ceilings.
Circadian-friendly settings matter more than most realize. Blue-heavy light after 9 PM suppresses melatonin. If she’s using LEDs late, switch to warm tones or enable a “sunset mode” that auto-shifts to amber hues. Many smart LED controllers, like those compatible with Alexa or Google Assistant, offer scheduling to handle this automatically.
For 12 year old bedroom ideas girl with LED lights, start with simpler controllers, physical remotes or single-color modes, before graduating to app-based RGB systems.
Combining LED Lights With Different Bedroom Styles
LEDs adapt to nearly any aesthetic if placement and color align with the room’s palette.
Modern/Minimalist: Stick to cool whites or single accent colors. Install strips in hidden channels, behind floating shelves, under the bed frame, or in ceiling coves. Avoid visible wires: use aluminum channels with diffusers for a clean, built-in look.
Boho/Eclectic: Warm whites and amber tones suit macramé, rattan, and plants. Drape fairy-style LED strings over a canopy, wrap them around a ladder shelf, or weave through hanging planters. The key is layering, combine overhead fixtures, accent strips, and string lights for depth.
Glam/Hollywood: Think vanity mirrors, crystal accents, and metallics. Frame mirrors with daylight LEDs, add strips under a tufted bench, or backlight frosted acrylic panels for a custom headboard. Dimmable strips let her dial intensity for photos or relaxation.
Industrial/Urban: Exposed Edison bulbs and metal fixtures play well with RGB neon-style LED tubes. Mount flexible neon strips in geometric patterns on a feature wall, or outline architectural elements like exposed brick or metal bed frames.
Coastal/Soft Pastels: Soft blues, blush, and whites benefit from neutral or cool-white LEDs. Keep it subtle, under-bed glow, inside open shelving, or along a window valance.
No matter the style, avoid overloading a single circuit. Most bedroom circuits handle 15 amps. LED strips draw little power, but if she’s adding multiple sets plus a desk lamp, charging station, and speaker, double-check the breaker rating.
Budget-Friendly LED Lighting Tips and Shopping Guide
Good LED setups don’t require a fortune. Here’s how to maximize impact per dollar.
Start with a kit. Basic 16.4-foot RGB strip kits with remote and power supply run $15–$30. For younger teens (12–13), these cover most use cases, bed backlighting, desk accent, shelf highlight.
Upgrade selectively. If she wants app control or music sync, look for kits with Wi-Fi or Bluetooth controllers ($25–$50). Brands like Govee, Philips Hue (pricier but rock-solid), and Lepro offer reliable options. Check if a hub is required, some systems need a separate bridge, adding $40–$60.
Cut and extend strategically. Most strips can be cut at designated marks and reconnected using solderless connectors ($8 for a 5-pack). This lets her cover odd dimensions without buying multiple full reels.
Reuse and move. Peel-and-stick strips can migrate to dorm rooms or apartments later. Treat them as a portable upgrade, not a permanent install.
DIY diffusion. Raw LED strips can look harsh. Slide them into clear or frosted aluminum channels ($12–$20 for 6.5 feet) for a softer glow and a finished look. Channels also protect the strip and make removal cleaner.
Watch for sales. Prime Day, Black Friday, and back-to-school promotions often drop LED prices 30–50%. Stock up then.
Safety checks:
- Verify the power adapter is UL-listed.
- Don’t daisy-chain multiple strips beyond the controller’s rated wattage (usually 72W for a 12V, 5A supply).
- Keep strips away from fabric or paper that could contact the adhesive backing if it loosens.
- Use surge protectors for smart controllers to prevent damage from power spikes.
For 13 year old bedroom ideas girl with LED lights, consider giving her a set budget and letting her choose colors and placement. It builds ownership and teaches practical decision-making.
Finally, test before committing. Unroll a strip, power it up, and preview placement with painter’s tape. Once satisfied, peel and stick. That extra five minutes prevents do-overs and wasted adhesive.