


Table of Contents
ToggleBedroom storage doesn’t have to mean bulky dressers eating up floor space. Smart shelving, mounted on walls, tucked into corners, or built flush with existing architecture, adds storage capacity without shrinking the room. Whether working with a cramped apartment bedroom or redesigning a larger space, the right shelving approach balances function with visual appeal. This guide covers proven bedroom shelving ideas that work in real homes, from floating brackets to custom built-ins, with installation tips and material considerations included.
Key Takeaways
- Bedroom shelving ideas like floating shelves and built-ins maximize storage without consuming floor space, making them ideal for cramped apartments or larger rooms needing smart organization.
- Floating shelves mounted to wall studs with concealed brackets create a clean, modern look and work best when staggered asymmetrically in contrasting colors against walls.
- Above-bed shelving must be anchored directly to studs using lag screws (minimum 1/4″ diameter, 3″ length) with at least 12-18 inches clearance above the mattress for safety.
- Corner shelves and tension-pole systems transform wasted spaces into functional storage, with pole systems offering renter-friendly, tool-free installation for lightweight items.
- Small bedrooms benefit from vertical shelving solutions like recessed shelving between studs, wall-mounted nightstands, and ladder shelves that maximize height while preserving walking space.
- Proper installation requires essential tools (stud finder, level, drill, socket wrench) and accurate measuring; built-ins involving structural changes or load-bearing stud modifications may warrant professional help.
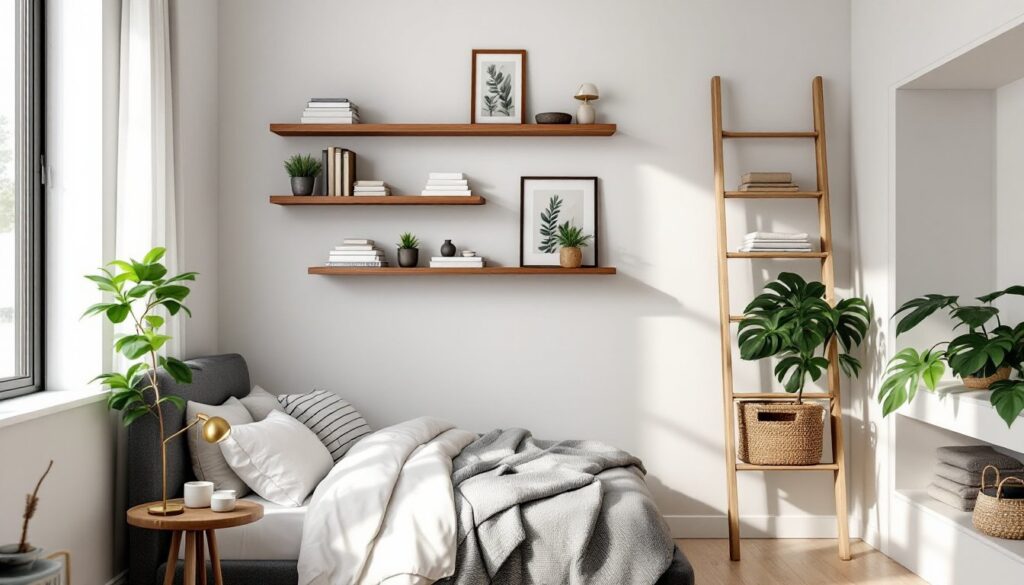
Floating Shelves for a Modern, Minimalist Look
Floating shelves mount directly to wall studs with concealed brackets, creating clean horizontal lines without visible hardware. They suit bedrooms where floor space is tight and wall real estate is the better option.
Material and Load Considerations
Common materials include solid wood (pine, oak, maple), MDF with veneer, or metal. For bedroom use, books, small plants, photo frames, expect loads between 10-30 pounds per shelf. Hardware matters: heavy-duty toggle anchors work in drywall, but screwing into studs provides superior holding strength. Nominal 1×8 or 1×10 lumber (actual dimensions 3/4″ × 7.25″ or 3/4″ × 9.25″) makes sturdy floating shelves when paired with steel rod brackets recessed into routed channels on the back.
Installation Notes
Use a stud finder to locate framing. Mark level lines with a laser level or 4-foot carpenter’s level, eyeballing rarely works. Pre-drill pilot holes to prevent splitting, especially near board ends. If studs don’t align with the desired shelf position, install a backer board (a horizontal piece of 3/4″ plywood) across multiple studs first, then mount brackets to the backer.
Design Tips
Arrange floating shelves in asymmetrical clusters rather than rigid grids for a contemporary feel. Stagger depths, pair a shallow 6″ shelf with a deeper 10″ shelf below, to add visual interest and accommodate different item sizes. Wall shelves for bedroom ideas work best when shelf color contrasts with wall paint: a walnut-toned shelf pops against light gray or white walls.
Built-In Shelving to Utilize Every Inch
Built-in shelves fit precisely into alcoves, around windows, or along entire walls, making them ideal for maximizing awkward spaces that freestanding furniture can’t address.
Framing and Construction
Built-ins require a framework, typically constructed from 2×2 or 2×3 lumber to form vertical supports and horizontal shelf cleats. Fasten the frame to wall studs using 3″ construction screws. Shelves themselves can be 3/4″ plywood, solid wood, or MDF. For spans over 30″, add a center support or use thicker material (1″ plywood) to prevent sagging.
Finish edges with iron-on veneer tape (for plywood) or solid wood trim secured with finishing nails and wood glue. Prime and paint built-ins to match trim color, or stain to match existing woodwork.
Professional vs. DIY
Built-ins involve measuring, leveling, and scribing to fit irregular walls, skills that improve with practice. DIYers comfortable with a miter saw and drill can handle most bedroom built-in projects. But, complex designs with lighting, intricate trim, or structural modifications (removing drywall to recess shelves between studs) may warrant hiring a finish carpenter.
Code and Structural Notes
Removal of drywall is cosmetic and doesn’t typically require permits. Cutting into studs for recessed shelving does, consult local building codes. Never cut or notch load-bearing studs without engineering approval.
Corner Shelves That Transform Wasted Space
Corners accumulate clutter or sit empty. Corner shelving, floating triangular units, ladder-style designs, or built-in alcove shelves, captures that dead zone.
Floating Corner Shelves
Triangular floating shelves use concealed brackets anchored into studs on both adjoining walls. Measure the corner angle first: most interior corners are close to 90°, but older homes may vary. Cut shelves from 3/4″ material using a miter saw or circular saw with a guide. Sand edges thoroughly, then finish with polyurethane or paint.
Tension-Pole Systems
Floor-to-ceiling tension poles with adjustable shelves offer tool-free installation, no drilling required. They’re adjustable and removable, making them renter-friendly. Weight capacity is lower (typically 15-25 pounds per shelf), so they suit lightweight bedroom items like hats, small books, or décor.
Built-In Corner Units
For permanent solutions, frame a corner unit with vertical 2×2 supports running floor to ceiling, secured at top and bottom plates. Add shelf cleats at desired heights. This approach works well in walk-in closets or dressing areas adjacent to bedrooms. Bedroom shelves ideas often incorporate corner units to display folded linens, shoes, or accessories without protruding into the room’s center.
Above-the-Bed Shelving for Books and Décor
Mounting shelves above the headboard uses otherwise empty vertical space, but requires extra care, safety and secure fastening are non-negotiable.
Safety First
Anything above a bed must be securely anchored to wall studs, not just drywall anchors. Use lag screws (minimum 1/4″ diameter, 3″ length) driven into studs. Check fastener torque: shelves should feel immovable when tugged. Avoid overloading, keep heavy items like large hardcovers to a minimum, and never place anything fragile or loose-fitting that could fall during normal movement (sitting up, adjusting pillows).
Clearance and Ergonomics
Leave at least 12-18 inches between the top of the mattress (or headboard) and the bottom of the lowest shelf. This prevents head bumps when sitting up. Mount shallow shelves (6″ deep or less) to minimize protrusion.
Design Variations
Single long shelves spanning the bed width create a gallery effect for framed art or small plants. Stacked shelves (two or three tiers) work for book collections. Some DIYers incorporate LED strip lighting on the underside of shelves for ambient reading light, low-voltage LED tape is a simple add-on, adhered with the included backing or small clips, and powered by a plug-in adapter.
Installation Tools
A stud finder, level, drill with bits for pilot holes, and a socket wrench for lag screws are essential. Pre-drill to avoid splitting wood and to ensure screws drive smoothly into studs.
Ladder Shelves for Versatile Storage
Ladder-style shelves lean against the wall at an angle, requiring no mounting hardware. They’re portable, easy to assemble, and suit renters or anyone hesitant to drill into walls.
Construction and Stability
Ladder shelves typically use two side rails (2×3 or 2×4 lumber) and horizontal shelves (1×10 or 1×12 boards) attached with pocket screws or dowel joints. The angle, usually around 75-80 degrees from the floor, provides stability. Add rubber or felt pads to the feet and top contact points to protect flooring and walls.
Commercial ladder shelves are widely available in wood, metal, and composite materials. When buying, check weight ratings per shelf (often 15-25 pounds for lighter units, up to 50 pounds for heavy-duty steel designs).
DIY Build Tips
For a custom ladder shelf, cut side rails to desired height (common range: 60-72″). Space shelves 12-15″ apart vertically. Use a Kreg Jig or similar pocket-hole system for strong, hidden joints. Sand all surfaces to 120-grit or finer, then apply stain or paint. Polyurethane topcoat adds durability.
Bedroom Applications
Ladder shelves work well beside nightstands for extra book storage, in corners for plants or décor, or near dressers for folded clothes and accessories. Their open design keeps bedrooms feeling airy, unlike closed cabinets.
Creative Shelving Ideas for Small Bedrooms
Tight bedrooms demand shelving that doesn’t consume precious floor area. Vertical thinking and multi-functional designs make the difference.
Over-the-Door Shelving
Over-door racks with shelves or hooks hang on standard interior doors (1-3/8″ thick) without tools. They hold shoes, bags, or folded linens. Weight capacity is modest, 10-20 pounds total, so avoid overloading.
Recessed Shelving Between Studs
Wall studs are typically spaced 16″ on center in most modern construction (older homes may use 24″). Cutting drywall between studs and adding shelves creates storage niches 3.5″ deep (the actual depth of a 2×4 stud). This works for paperback books, toiletries, or small décor items. A reciprocating saw or drywall saw cuts openings: frame edges with 1×2 trim. If cutting multiple studs, consult an engineer, never compromise structural integrity.
Wall-Mounted Nightstands with Shelving
Replace traditional nightstands with wall-mounted shelves or shallow boxes (8-10″ deep). Mount them 24-28″ above the mattress top for easy reach. Include a small shelf or cubby below for a phone, book, or glass of water. This frees floor space for vacuuming and makes small rooms feel larger.
Vertical Stacking
When floor space is limited, go tall. Install shelves up to 7-8 feet high, using a step stool to access upper storage for seasonal items or less-used belongings. Bedroom shelving ideas on the wall that prioritize height over width help maintain walking space around the bed and dresser.
Conclusion
Smart bedroom shelving turns walls and corners into functional storage without sacrificing floor space or style. Whether installing floating shelves, framing a built-in, or leaning a ladder unit against the wall, success comes down to secure mounting, accurate measuring, and matching the shelf type to the room’s layout. With the right materials and a few essential tools, most of these projects fit within a weekend DIY timeline.